Categories
Journals

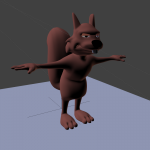
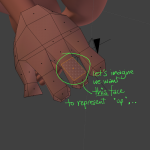
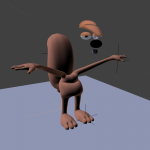
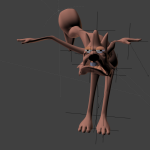
Still modelling Grumpy Squirrel.

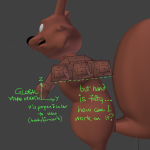
Just in case you’re thinking “What is this sorcery and where can I get some?”, this gallery of horrors is courtesy of Blender 2.70’s shiny new Laplacian Deform modifier.

The workflow goes like this:

  • Make a new vertex group. Select it. Name it something relevant like “Laplacian Deform Anchors” or “Anchors”.
  • Add vertices to a hook by highlighting them and hitting Ctrl+H to add them to a new hook (this will create an empty)
  • Immediately hit Ctrl+G to add them to your anchors group
  • Repeat on different patches of verts that you want to use to control deformations – your modifier stack will have a Hook modifier for each hook you add. It’s a good idea to rename these as you go. Make sure you put any Hook modifiers underneath the Mirror modifier if you’re using it.
  • Once you’ve some hooks ready to go, add the Laplacian Deform modifier from the Deform menu. If you’re using the Subdivision Surface modifier, make sure that it’s being applied after the Laplacian Deform or Blender will chug on bind.
  • Select your “Anchors” group as your.. er.. anchors vertex group and hit Bind. Let it finish. (You’ve been hitting Ctrl+G to add your hooked verts to your anchor group as you go, right?)
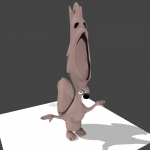
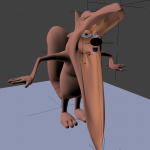
  • Move one of your hooked empties. Instead of just moving the hooked set of vertices, the mesh should react more like you’re stretching a rubber figure.

Tips:

  • Up the Repeat parameter to let the modifier refine its solution.
  • If you’re working with a character and the stretching is too unpredictable and weird, make sure you’ve put hooks on all the extremities. If something between two hooks is moving when you don’t want it to, try adding a hook to it.
  • Remember the ordering: Mirror, then Hook modifiers, then Laplacian Deform, then Subdivision Surface. Hook before Mirror will tear the mesh at mirror points; Laplacian Deform after Subdiv will cause chug.
  • Unlike armatures, empties don’t return to a useful default position when you hit Alt+G. If you want them to, parent them to bones in an armature.
Categories
Journals

Well this is terrifying..

Categories
Journals

Yeaaaaahhhhh nah. Were there gods of topology, I’d owe them an apology.

I need practice modelling hands anyway. Time to dump this abomination and start over with the method a certain Jonathan Williamson used in the 2010 Kara Training series, I reckon. 🙂

Categories
Journals

Note: You may need to click the pictures to get readable versions. 🙂

Today’s Blender pro-tip concerns Align View To Selection and Transform Orientations. In a nutshell, a transform orientation is where X, Y and Z point. Better-known transform orientations in Blender are Global, Local (object-derived), Normal (selection-derived) and View (view derived). What I learnt tonight is that you can also set your own!

What I hadn’t realised until tonight was that it’s possible to not only “bookmark” useful transform orientations but also align the view to them. I wanted to do this when I was working on a hand that was tilted at a slight angle, making global/normal orientations not useful.

Select a face which is oriented flat according to the view you want. You can then press Shift+Numpad1/3/7 to orient the view to the selection (Shift+Ctrl+Numpad1/3/7 also works) – this works best on faces; edges can be unpredictable. To save the orientation, hit Ctrl+Alt+Space. There’s a Transform Orientations menu in the N-panel of the 3D View, accessible by pressing N, where you can update/rename/delete transform orientations.

The upshot of being able to set arbitrary transform orientations based on meshes is that you can work on meshes that are “rotated” – you have fake “local” axes for that part of the mesh which you can move, rotate and scale along. You can either use the gimbal or hit G/R/S then X/Y/Z twice depending on if you want side to side, perpendicularly side to side or up/down. (Or Shift+X/Y/Z twice to transform along complementary axes.)

The view orientation is also really handy to use in conjunction with the Looptools functions “Circle” (or in my case “Square”) and “Flatten”. “Circle” tries to make a circle out of the selected vertices (or a square if you’ve only got four verts selected), while “Flatten” among other things flattens the selection to the current viewpoint. Used in conjunction with “orient view to selection”, you can create rounded sets of vertices which are oriented in a particular specific direction relative to another face on the mesh.

Big ups to hjaarnio on #blender for that killer tip. 🙂

Categories
Journals

Hey, these hands don’t look so bad. How’s the topology?

Topology at the moment is somewhat “nope” – it can be mended. 🙂

Blender pro-tip to follow!