Just like last month, my day job bit hard into my time and energy, including one monster of a fourteen hour day (close to sixteen hours with breaks included) which started around 9:30am and finally wound up around half past one in the morning. Outside of work, I logged less than thirty hours of either training or making stuff. Forty hours in a month used to be low, now it’s normal.
Music
I released an album this month called Music for open plan offices. It’s a collection of noisy but calming ambient designed for knowledge workers in noisy offices in need of a relaxing sonic bubble. If you’re not sure what to make of that description, here’s track 2, “0716 (a leveraged synergy)”:
It’s selling for a cheap and cheerful $5 over at Bandcamp. You can preview the whole album before buying it.
Animation
Earlier in the year, I stalled on the last exercise of the lipsync course because using reference video just confused me with all that was going on. I doubled back and picked up the body mechanics course again. (Hooray for self-paced education!)
Why the switch? With body mechanics, the initial exercises are focussed on capturing a particular single action like a leap or a hop or a kick. A full acting shot has a lot of physical complexity to cover like weight shifts, eye direction, body movement and lipsync, all of which has to be motivated by the character. Jumping off a ledge? Not so much. There’s less to understand in a single action and analysing video reference is much more straightforward.
Not to mention, Instructor Wayne said to do body mechanics first. I understand why now. 🙂
Anyway, here is my blocking for a robot jumping off to ledge. Woohoo!
Somehow it still feels off, like there’s some indication of weight which is missing in the lift-off of the jump. Books like Animators Survival Kit can help when I get stuck, to some extent. There is really no substitute for an experienced animator’s notes and lots of practice though.
Summary: did another lip sync exercise, started an animation add-on, saw a quenda
It’s been June 2018! The Blender 2.8 Code Quest has just finished up and it’s been amazing to see all the progress. Also I saw a quenda (southern brown bandicoot) in the local park this month for the first time ever. Here it is!
You can see and share the video on YouTube at higher res here. (If I inline the YouTube video here, it’ll track you.)
I spent the long weekend at the beginning of June completing exercise 4 of CG Cookie’s Demystifying Lip Sync course – two versions of it! At first I wanted to try using pre-posed mouth shapes for speed’s sake. I got this. (The “Melvin” character is from CG Cookie.)
It’s OK but very over-enunciated, the mouth goes too open and seems to rise and fall on the face a lot, etc. I put it down to relying too much on hastily-created pose libraries.
On my next attempt, I did a pass keyframing the gape of the mouth every two frames. The next pass I keyed the width of the mouth on alternating frames to the mouth gape, then the roll/pout of the lips on the same lip keys on the next pass. I used the pose library to hit particularly fiddly shapes and polished problematic timing afterwards. This “poseless” lipsync workflow was nicely rapid and produced good results in much less time. See what you think!
Much better, I think!
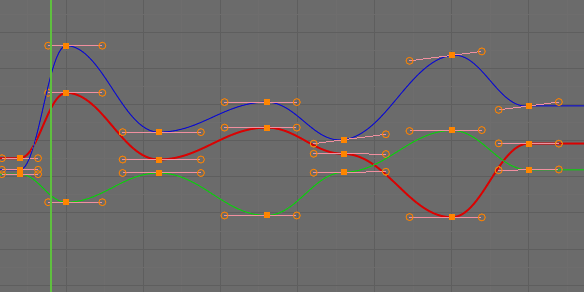
Speaking of animation, this month I started coding a animation tools add-on for Blender at the prompting of Looch. So far it has a couple of handy functions and one pretty cool function.
This shows a tool for the graph editor which makes actions more exaggerated or subtle. (animBot users might know this tool as Push/Pull.)
I’m doing time-critical project work at the day job this month and next month. This has meant some long (14+ hour!) work days. I’m making a point of relaxing and taking it easy when I’m at home so I don’t burn out too badly, so that means less animation/coding in my spare time and more sleep.
Next month is looking a little bit less intense than this month though, so hopefully I won’t have to resort to cute animal videos to sweeten the July recap. 🙂
I’ve loved the sound of the ondes Martenot ever since I heard it for the first time in the original “Ghostbusters” movie (pretty much the first thing in the movie you hear!). The ondes has a continuous controller called a “ruban” (as well as a keyboard), which is how it achieves those sweeping quivering notes.
The ribbon controller I got this month lets me have that some of that same expressiveness, and by expressiveness I mean hitting the wrong note a lot and having to cover it up with vibrato. Practice makes perfect!
Stuff I built
This is what I soldered together this month just gone.
Ornament and Crime polymorphic digital swiss army knife type thingy (3-5 January 2018) [modulargrid]
Music Thing Modular Magnetophon cassette tape head (16 January 2018) [modulargrid]
RYO 3xVCA triple voltage controlled amplifier (18 January 2018) [modulargrid]
RYO 2xVCX dual voltage controlled amplifier/crossfader and four quadrant multiplier (29 January 2018) [modulargrid]
Feedback 106 Chorus (30 January 2018) [modulargrid]
The Feedback 106 Chorus build was a bit of a disaster. It uses period vintage chips to get the genuine sound of a Juno 106’s chorus effect. When it works, it sounds bloody fantastic. When it works.
Usually I don’t bother with actual vintage stuff. For all the romance of vintage electronics, the reality is that they’re rare, expensive, unreliable, susceptible to failure, and even being counterfeited in the case of MN3009 chips. This chorus did sound fab so I at least wanted to have a punt at making one, but if the vintage bits turned out to be duds, I resolved to put the whole thing aside and cut my losses there and then. And that is pretty much how it went.
Unlike the 106 Chorus, I got the polymorphic digital module Ornament & Crime working after three nights of building and troubleshooting. This module of legend should keep me occupied for months while I discover everything it can do, let alone how to use that as part of a whole system. Here’s an early test of the o_C in “Harrington 1200” mode sequencing some pleasant Boards of Canada-esque chords.
A pleasant surprise this month is the RYO & Kymatica 2xVCX, a dual voltage controlled crossfader. Fading back and forth between two signals at audio rates creates all kinds of fun timbres, sort of like ring modulation (which the 2xVCX can also do). Here’s a little test I recorded which goes all the way from grimy analogue noise to happy little chords!
There’s enough space left for two more modules, both of which I’ve already picked out, but more about that next month! 🙂
Let’s talk Blender! And movies! And spaceships!
3D stuff
Alien Force
The secret project I mentioned back in November was some album artwork for the Alien Force EP. I did a big write-up on it which appeared on BlenderNation. The feedback has been a little sparse but generally positive!
Spaceship!
But that’s old news. Have some new news!
A moment in the sun
I am back in the sun (kind of)! Yay! (Kind of!)
At the beginning of the year I decided I liked the story mostly where it was. It’s the tale of a random labourer helping introduce a laser-obsessed geek to the Ultimate Laser Robot of his dreams. The current plan is to take the last scene of the story all the way through production as a pilot for the rest of the film, which means all I have to worry about for now is one single scene. My attention is contained to that one spot. Hooray!
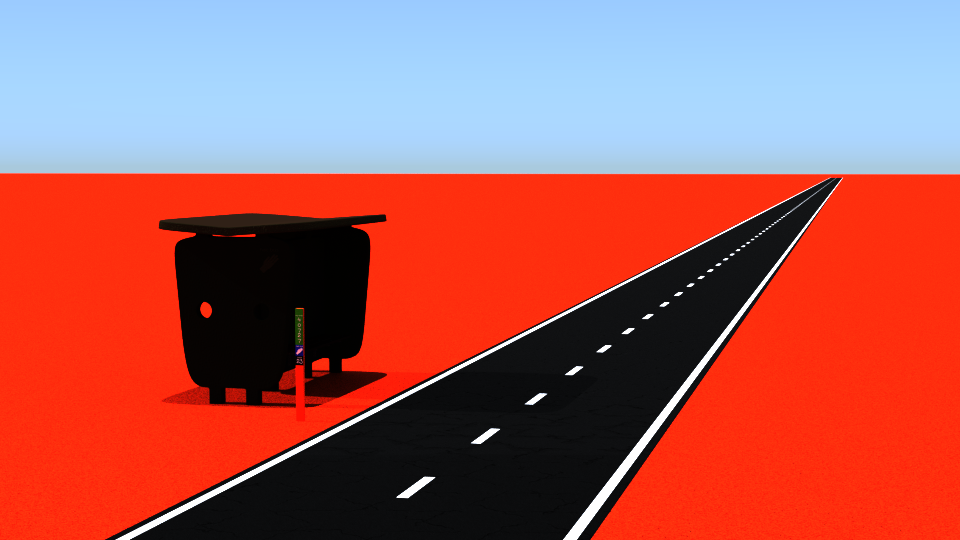
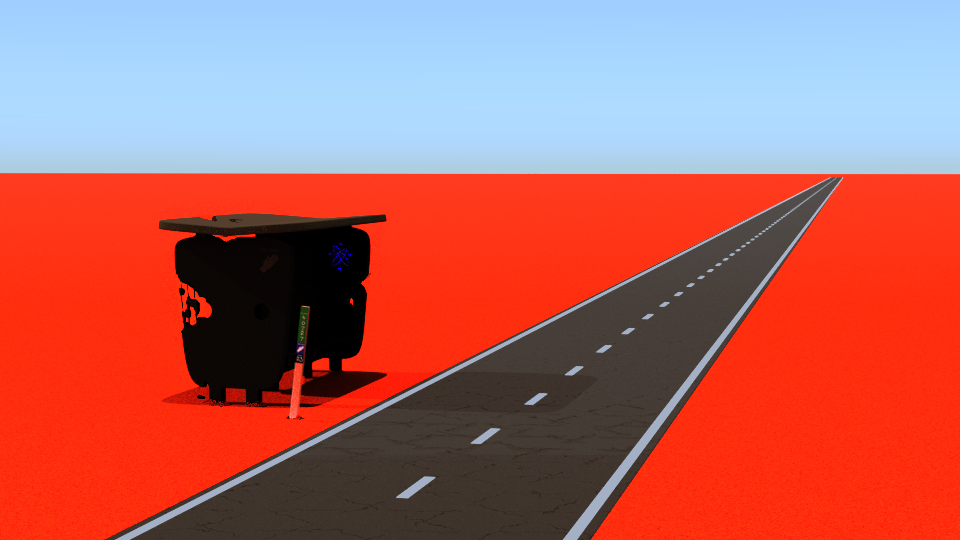
I’ve been working on Scene 5’s art direction by rendering existing elements out from Blender, turning them into multi-layer images in Krita, then doing quick paint-overs to test out ideas.
Splitting up render layers to import them into Krita
To do this I render two EXR files – a multi-layer version with transparency and all render layers turned on to get each element isolated on its own layer, and a single layer non-transparent version which gives me the sky background.
Here’s the rendered layers fresh out of Blender, looking fairly pristine…
From there I applied filters and painted over the separate elements to test ideas out.
…and here is the same scene altered to get everything looking more decrepit.
In the repainted version the air is hazier, the route marker is crooked, the bus stop is falling apart and the road is sun-bleached. The scene’s still undercooked but this much better than trying to get my thoughts down purely in 2D or 3D. Yay for hybrid approaches!
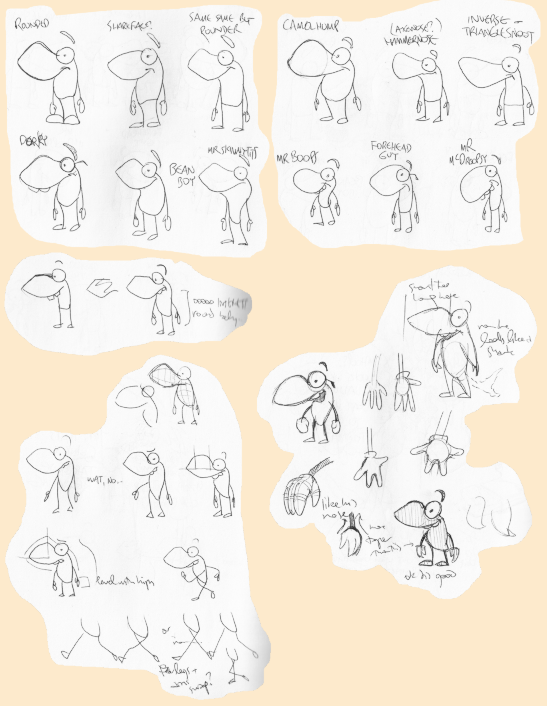
Character-wise, I’ve been redesigning Pointy to make the character look and feel more like he actually is – a bit happier and younger and goofier.
Many Pointies. The one in the lower right is the current front-runner.
Gronky isn’t in Scene 5, but he’ll be getting an ill-fitting hi-viz jacket when he does finally appear.
Alas, I got bogged down in story decisions around tone and character again. I’ve got some storyboards for that scene but without pinning down how I want to approach it all, I’m stuck. Bah!
I read somewhere that it’s better to have another thing to switch over to than beating one’s head against a single project, so I found one. I work on AMITS until I get frustrated, then switch over to this other thing until I miss working on AMITS too much.
The other thing: Fishtank
An ex-animator friend and I dreamt up an aquatic animated sketch-comedy series many years ago, something that might get picked up and lead to bigger things. We gave it the working title “Fishtank” and brainstormed a few ideas, but we didn’t follow through so it fizzled….
One of my ideas saw a little fish laying a massive guilt trip on its potential predators for daring to eat something so cute and helpless.
My key image, where Shark feels very conflicted about eating Little Fish..
A rough exploratory sculpt of the little fish with the big eyes
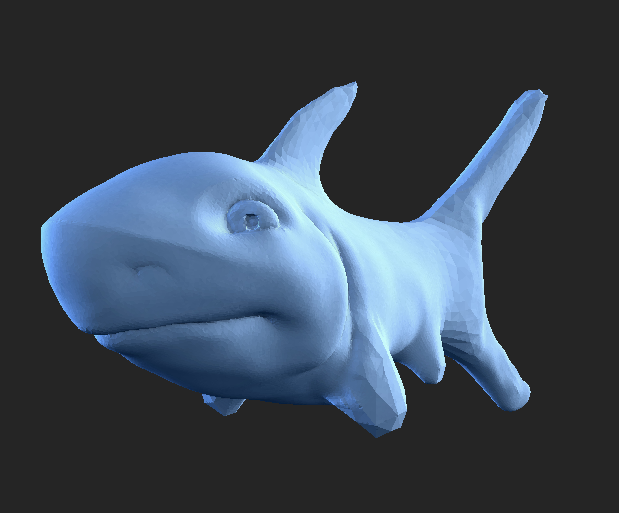
The predator in question is a great white shark who’s a bit of a softy and slow on the uptake.
An exploratory rough sculpt of the shark. Not quite there yet, but getting closer!
Will the little fish end up a snack, or will the shark get more than he bargained for? Yes.
“Fishtank” is a much smaller project than AMITS, and definitely better sized for one person to work on. I might not finish AMITS this year, but this one I could conceivably get done by the end of the year.
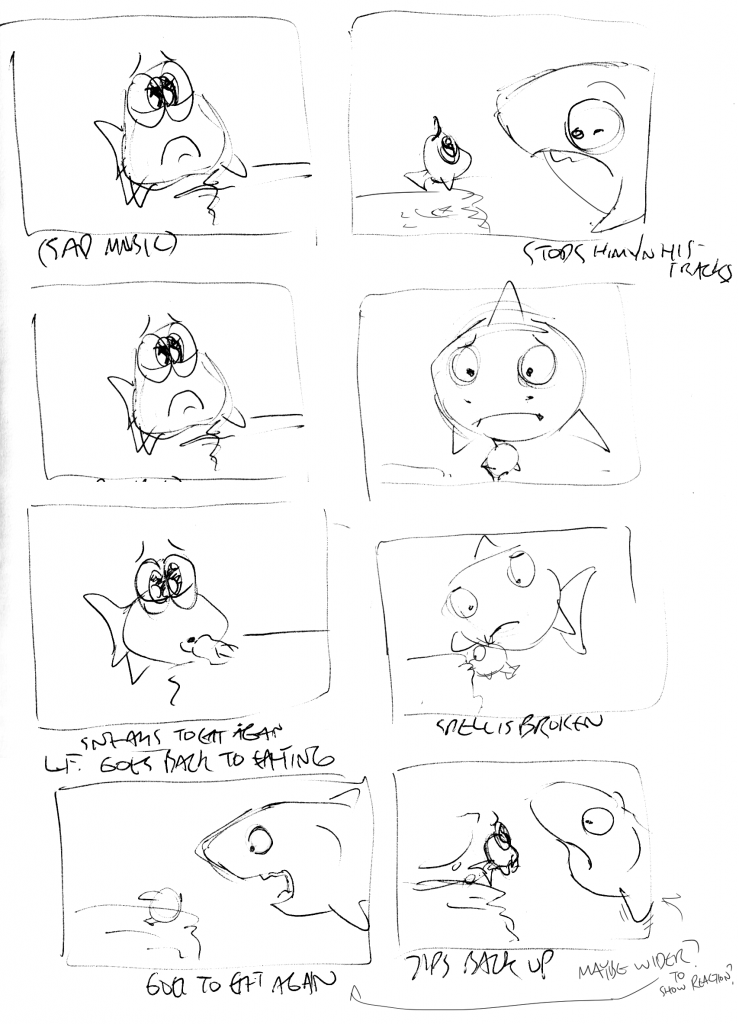
I’ve got the story thumbnailed out already. Here’s the second of five pages of story scribbles which I drew on actual paper in biro then scanned into Krita.
Shark tries to get a chomp in but Little Fish isn’t having it!
I’m really looking forward to writing the music for this as well. It’s going to be an utter hoot writing completely overwrought tragically sad music, like that 1960s library music which Ren and Stimpy used to superb effect.
Despite both projects being comedies, Fishtank is more classic slapstick and AMITS is more inspired by 1950s Looney Tunes which is as indebted to radio comedy as the silents, so they complement one another pretty well.
See you next month with more fish, more sun and the final pieces of DASYRAC! 🙂
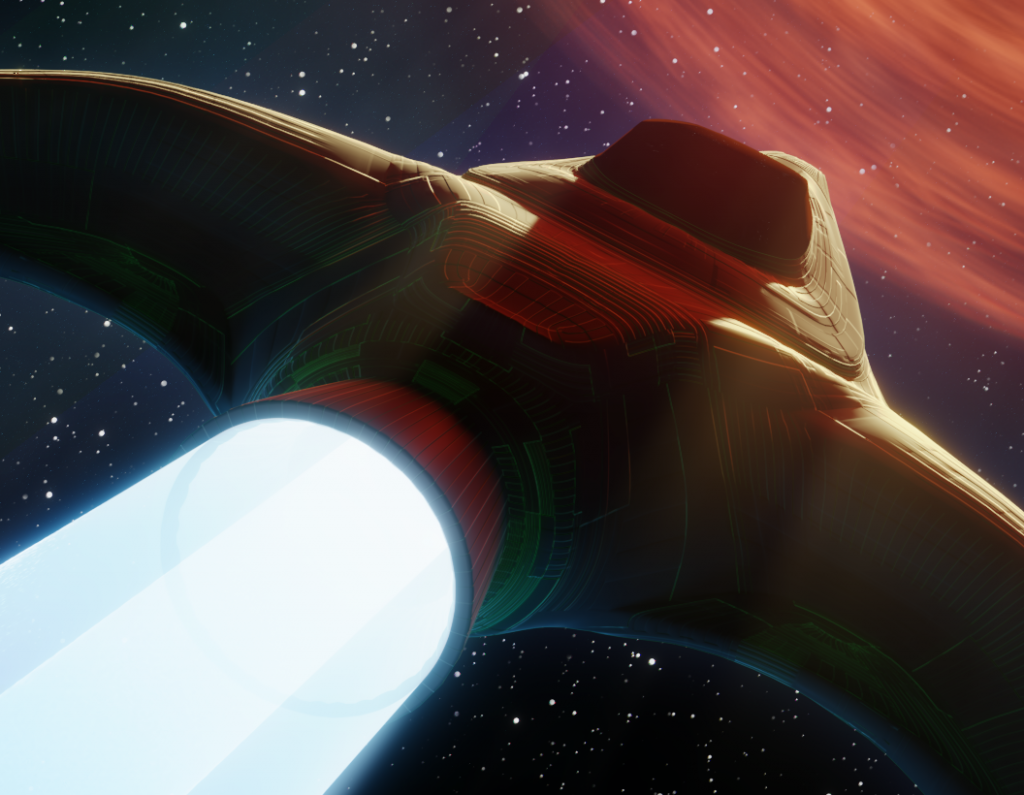
The secret project I’ve been hinting at since late 2017 was a sci-fi album cover for the trance musician Alien Force. It was completed back in November last year and has been waiting for a distribution slot since… until now!
Back in October 2017, Alien Force told me to make an album cover for him on the basis that I knew how to use 3D software. It would be unpaid work, but I took it anyway because it was something that would take me well out of my comfort zone. I appreciated that he asked me to produce something without seeing anything like a portfolio.
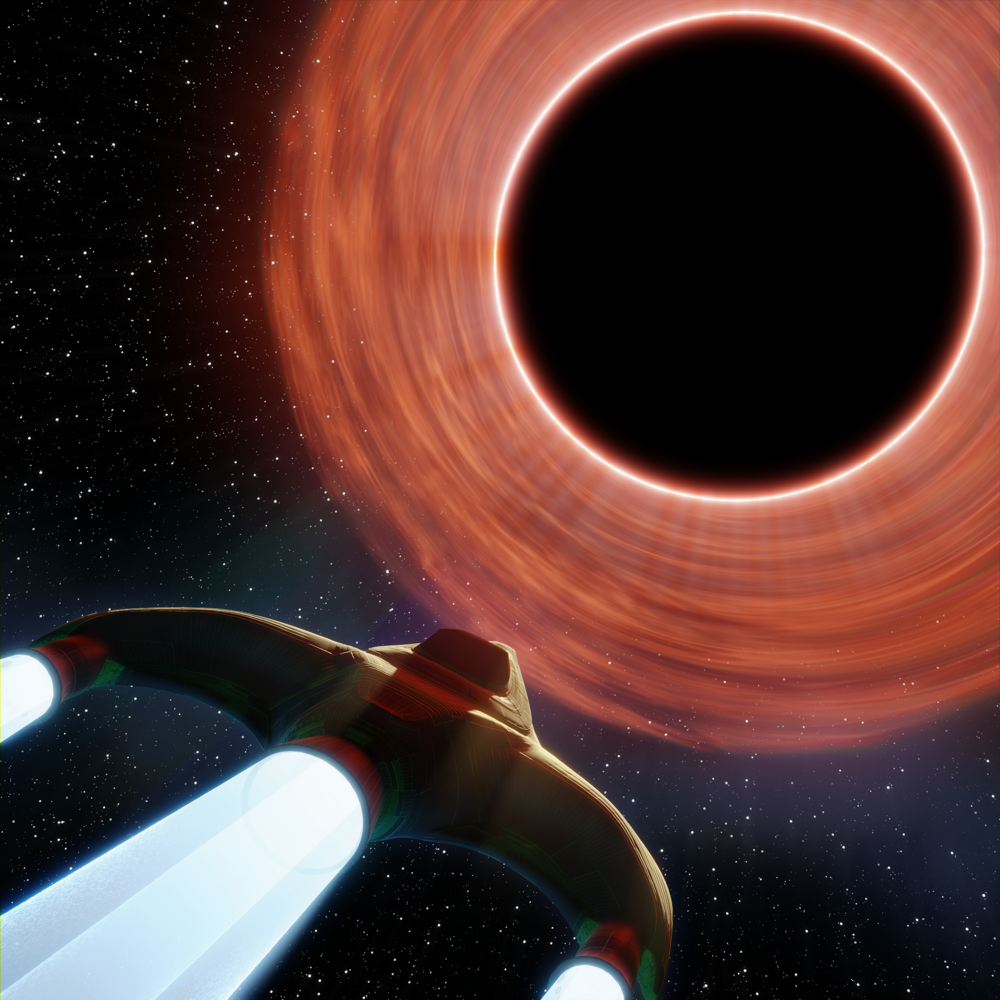
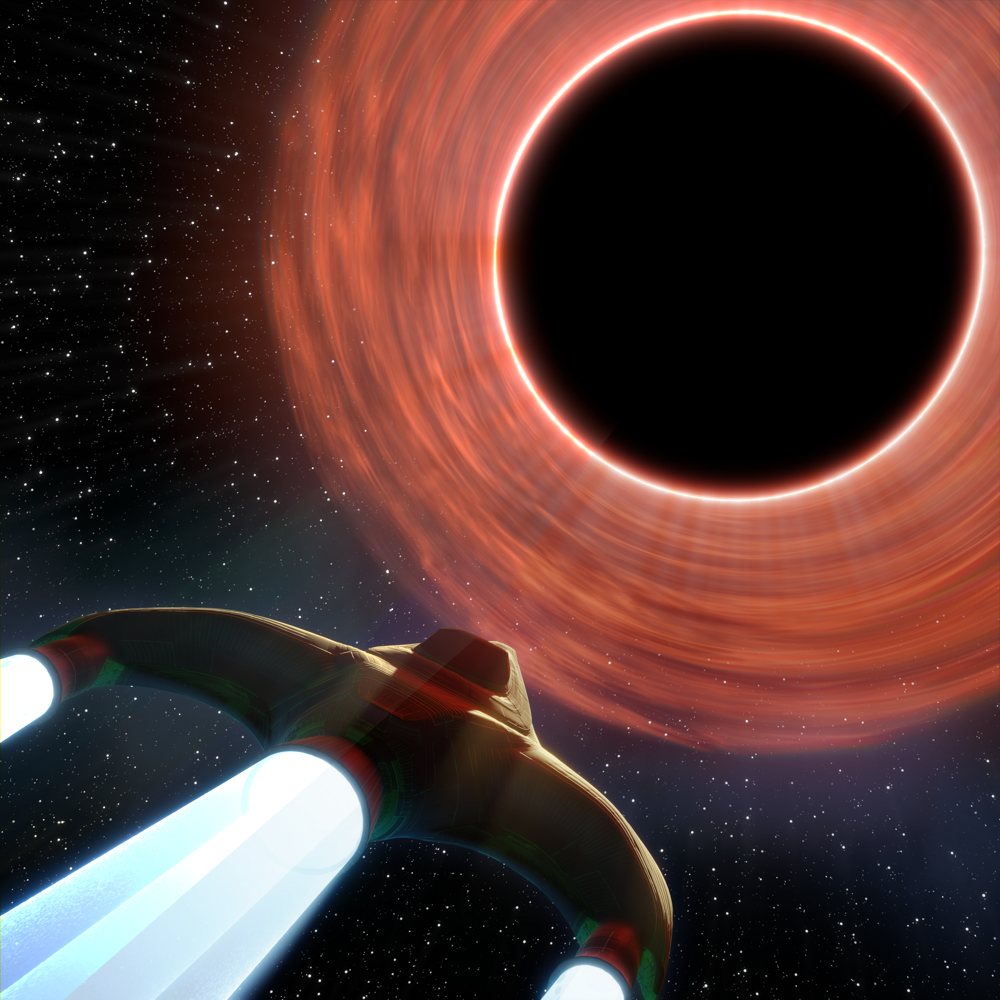
The brief was to capture something of Christopher Nolan’s Interstellar but “menacing and awesome” too. After a month of back and forth outside of the day job, we settled on this:
Whoosh!
After slogging through one too many full 3D re-renders, I learnt the value of being able to iterate as rapidly and painlessly as possible. I broke the scene up into layers which would only come together at composite time. Each element (the background star field with nebula, the swirly orange clouds, the black hole and the spaceship with its jets) was rendered separately as multilayer OpenEXR and composited together.
The background nebula and stars are done procedurally, pretty much as Aidy Burrows and Gleb Alexandrov teach it in their excellent Space VFX Elements course for Blender. The swirly orange bits are from failing to make Gleb’s accretion disk shader to work but getting something usable anyway. If any of this stuff interests you at all, check out that course!
Don’t get too close!
The blown-out glow of the black hole was one of the key bits of Interstellar’s look which Alien Force wanted to keep. I used a super bright emission shader, Blur, Sun Beams and Glow filter to blow the glow out from a line a couple of pixels wide to something which better sells how bright it is.
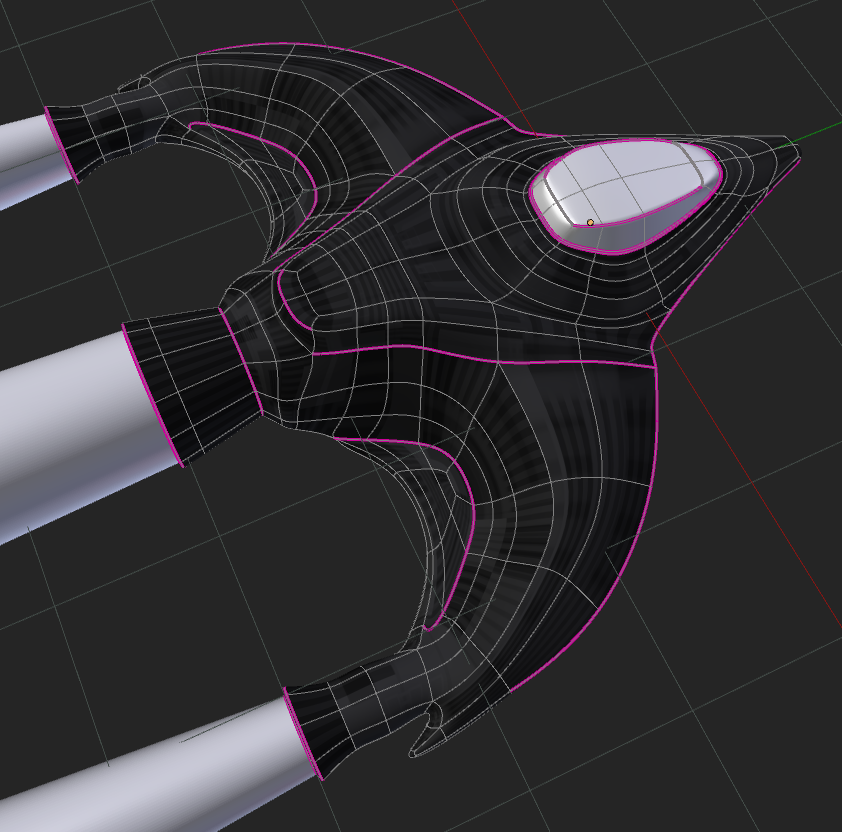
Spaceship! The pink bits are sharp marks, the nicer way to get sharp edges while doing subdivision modelling.The grey texture map is used for displacement.
The spaceship is a relatively simple model which uses the “Follow Active Quads” UV unwrapping trick along with some 32-bit textures to greeble it up. This technique was the centre of a five year old thread on BlenderArtists called “Sculpting with UVs and displacements”. Definitely worth checking out if you ever need to build a detailed-looking spaceship quick!
Spaceship! With UV-mapped greebles…
The subtle outer glow of the spaceship was added in composite, something to make the silhouette pop against the nebula and stars. The green glow within the silhouette of the ship was a happy accident – I rendered out every single pass for the spaceship and stumbled on a mysterious pass called “DenoisingNormalVariance”. It made the end result look cooler, so that’s good enough for me.
The composite was put through Troy Sobotka’s awesome filmic LUTs. This let me work confidently with a high dynamic ranges, knowing that the LUTs would bring out the missing dynamic range instead of clipping it or losing it altogether.
Default LUT in top left, filmic LUT at lower right.
Here’s a comparison between Blender’s default internal look and Filmic to finish off with. The biggest difference is visible in the spaceship. With the default LUT, the exhaust is blown out and the contrast on the ship itself is less. The Filmic LUT preserves more detail in the exhaust and brings out extra contrast in the surface details on the ship itself.
If you want to hear the Alien Force EP itself, you can have a listen on Beatport. It looks like in the process of slapping the logo on the black hole they also cranked up the saturation hard, but that’s showbiz. 🙂
Thanks for reading and I hope you liked this breakdown.
It’s been 13 to 19 August 2017. The animation for Shot 3 is done and I’m midway through 36 hours of rendering as I type this. There’s 286 frames to render in total with each 16-bit 1920*1080 OpenEXR frame rendering in 11 minutes on my desktop and in 19 minutes on my laptop. As of right this minute, there’s about 37 frames left to do. It’s all looking fine so far with nothing obvious to fix up in composite.
No need to wait for this though – here’s a boomsmash of the final (unrendered) animation, based on last week’s blocking. I might tweak a few frames in final edit, but it’s render-ready. 🙂
Not all cactuses levitate when you scream at them, but you should always try it just in case.
Instead of hopping directly into Shot 4 once Shot 3 is rendered, I want to jump over to sound editing for the existing shots so I don’t get too backlogged there. Also I just took delivery of a nifty frequency shifter which should be super helpful for creating the hum of a levitating cactus…
Speaking of Blender 2.79 though, it’s going to be a big release: I’m already using the new render denoising and filmic colour LUTs for AAAAAAAAAA; surface deform will likely come in very handy down the track; and Blender users have been patiently awaiting a principled shader and shadow catcher for literally years. Also the simplifications to the video encoder panel are awesome. If you’re a Blenderhead, go grab the release candidate, read the release notes on what’s changed and report any bugs you find! 🙂